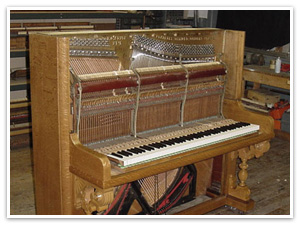
Restoration
Thinking of restoring or refinishing your piano? Take a walk through the 3 sections
of your piano that may need restoration, and contact us with the information
on your specific piano. Before we book the piano mover, you and I will work together
to determine different options, or if it is even worth investing the money to
restore your piano.
Restoration is a general term that may include any or all of the following:
- Action Work
- Refinishing the Case [click]
- Rebuilding the Belly [click]
- Upright Pianos—Rebuild or Restring? [click]
Restoring the Action
The piano action is the mechanical link between
your fingers and the strings. The action is made from wood, leather,
felt and metal, roughly 7,500 parts in total. Wood expands and contracts.
Felts and leather wear. It is truly amazing that despite these “primitive” materials,
a piano action can last a very long time (50–100 years) and still
give you outstanding performance—as long as it is well maintained.
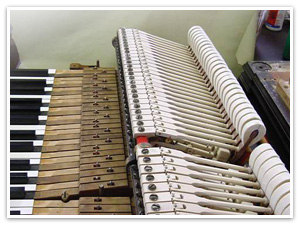
A
rebuilt Steinway grand action—all new parts.
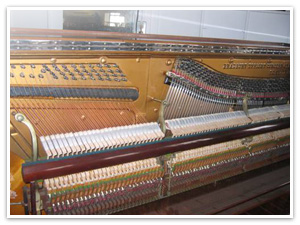
An
upright action—new hammers, shanks and butts.
All action work is not created equal! One technician’s idea of regulation might be spending ½ hour extra in your home when on a tuning call, another technician would think regulation means 8 to 16 hours in the shop.
Reconditioning the action in some shops might be defined: Minor repairs, reshape the hammers, and align the parts.
At David Estey Piano Service, reconditioning the action in the shop automatically includes replacing the key bed felts, capstain felts, polishing the balance and front rail pins, leveling the keys, polishing the capstains, reshaping the hammers, aligning the parts and much more.
It is not in your best interest in any aspect of piano restoration to go with the “lowest bidder”. Action work is a notorious area for “cutting corners”, because people simply don’t know or understand how much is involved, if properly done. You complain about price once- you complain about low quality forever. Below is an example of shoddy action work. This customer got 2 estimates for their Steinway Action work. My price was higher, so they went with the cheap guy. Here is what his work looked like.
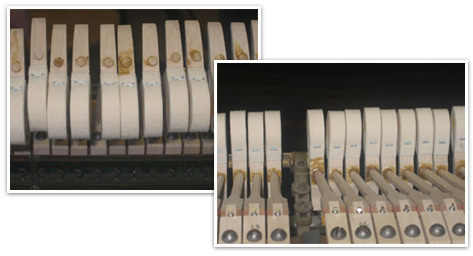
The Wrong Way
Not only were the parts installed terribly, the hammers were the wrong
size for the piano. We had to start from scratch. The Customer had
to pay twice—the “cheap” price from the other shop
turned out to cost a lot more than our original quote for quality work.
Here is what our work looks like. Even if you know nothing about pianos or action work, you can see the vast difference.
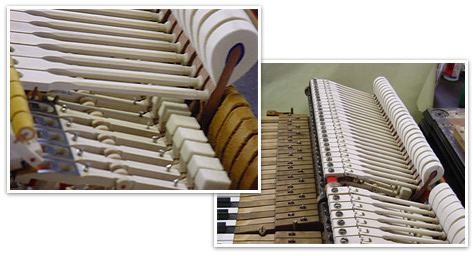
The Right Way
Correct parts. Installed correctly. Isn't that beautiful?
There are different grades of action work, as some actions are in good condition, and others are in very poor condition. Prices vary with condition, and there are usually many options. The important thing is that you have a realistic understanding of what you have, and what you can expect from it.
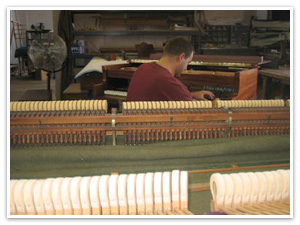
Up to our shoulders in action work!
Refinishing the Case
Great care is taken on all the finishes we do. We do not “farm out” our
refinishing like most shops do. We do not hire “contract labor” to
do our refinishing. I have found both of those options to produce inconsistent,
inferior work, along with poor timing and poor quality. Our own team of
craftsmen, dedicated only to our own restoration work will hand craft your
piano finish with great pride.
There are basically 2 types of finishes for pianos: open pore and closed pore. Closed pore is when you can see the pattern of the grain, but the texture has been filled in. Open pore is when you can see not only the grain pattern, but also the grain texture. You can see the small “pits” in the wood.
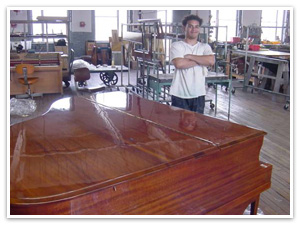
High Polish Closed Pore, with Victor Diaz very pleased with his work.
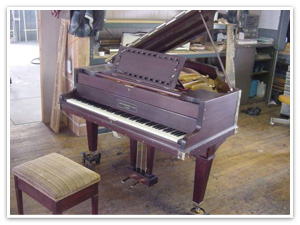
Satin Closed Pore
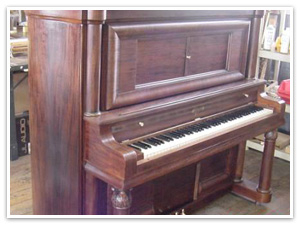
Open Pore Finish
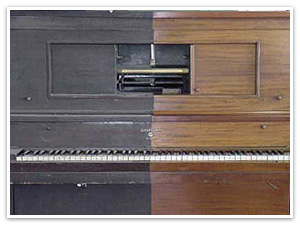
Our famous before and after player piano.
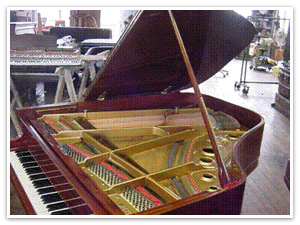
The “Belly” is what makes a piano heavy. Why? When all the strings are at their proper tension, tuned to A=440, a concert grand piano holds about 18 tons (9 mid size cars on a string) of pressure. The piano is engineered to handle this kind of stress for a very long time. The metal plate holds much of the tension, and on well built pianos, the stress is shared with beams built into a very hefty case.
When disassembling a piano, one must take great care in the measuring and removal of all original strings.
A pattern is taken of the bass strings (all of which are coiled) and custom made for each individual piano.
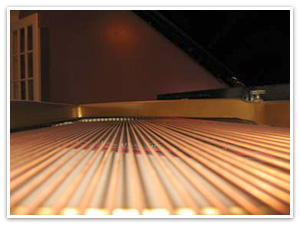
The tenor strings to the treble are made of high quality steel, in different gauges.
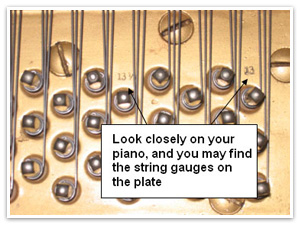
The lower the note, the heavier (or thicker) the guage. There is a specific pattern in which the strings are loosened for removal. If this pattern is not followed, it could crack the plate – a problem that is as close to unsolvable as possible.
Another extremely important measurement is the position of the metal plate. Should this measurement be overlooked, and the plate is put back in a slightly different position, it will change the voice of the piano, sometimes drastically for the worse, forever.
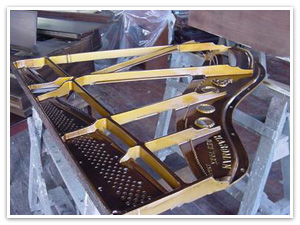
After the strings and the plate are removed, the soundboard can be repaired or replaced as needed.
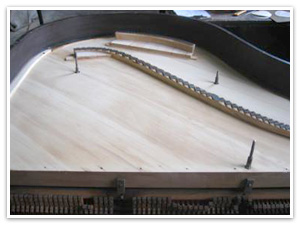
Soundboard repair is a viable option, only if the soundboard has retained its “crown” over the years. A simple illustration of crown is shown below:
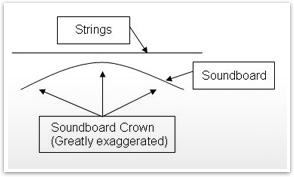
A quality soundboard is made of solid spruce. Most soundboards will develop cracks in them due to humidity changes from year to year. This occurs in the best of pianos, and the worst of pianos.
You may have heard (probably from a new piano salesman) that if the soundboard is cracked, the piano is ready to throw away. This is a fable. The only crack that can send a piano to the junk heap is a crack in the PLATE. Even then, a cracked plate can be repaired, by the right person, using the right materials – but of all piano repairs, repairing a cracked plate is by far the most risky, due to the enormous tension from the strings. A cracked pinblock can be replaced, and a cracked soundboard can certainly be repaired or replaced.
The crack in the soundboard is actually the least of the problems in repair, and is more cosmetic than anything. The most important aspect of soundboard repair is to be certain that the board is glued solid to the ribs.
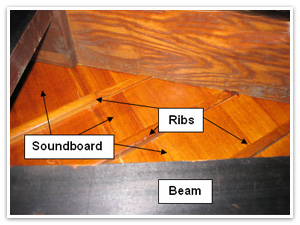
There are many methods to accomplish soundboard repair. One of the faster and cheaper methods leaves metal screws buried in the soundboard forever. Our standards are higher. We use screws to clamp the board to the rib, and when the glue is dry, we remove the screws and glue wooden dowels, for the strongest bond possible. The crack is filled with a spruce shim, glued directly into the crack itself.
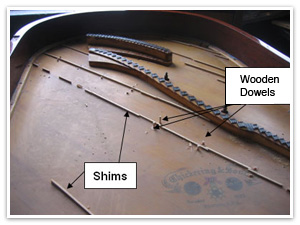
All soundboard repair takes place only after we have dried the board to accentuate the cracks, or any other problems it may have, and it is repaired in this dry state. Once the board absorbs humidity, theoretically, it will not cosmetically crack again – certainly it will never come loose from the ribs in our lifetime, under normal circumstances.
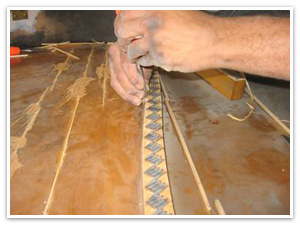
The board is then scraped – not stripped with harsh chemical strippers, which can have an adverse effect on the wood of the soundboard. It is then sanded and finished, along with the bridges being scraped of old dull finish to reveal the beautiful white maple.
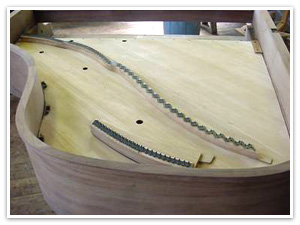
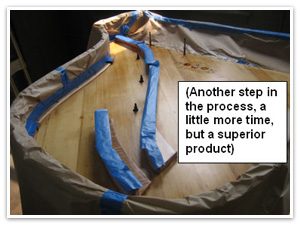
Notice the tape covering the bridges as we are finishing it? That is a precaution to keep finish off the surface of the bridge. The only thing that should be between the string and the maple bridge is graphite, to allow the string to slide smoothly.
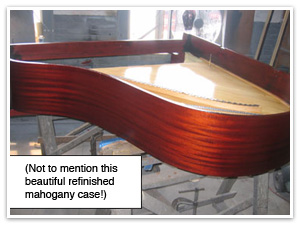
Oh, one more thing about the soundboard- The Decal. After the first coat of finish, we apply the decal. It is then sprayed with its final coats, to seal and protect it – keeping it beautiful forever. You may think that this is common practice, but it is not. Many shops will apply the decal last (it’s easier and takes less time) which leaves it vulnerable to peeling and aging . . . not a pretty site.

After the plate is removed, it is cleaned and prepped. Preparing the plate for refinishing includes filling in any cosmetic problems it may have from the old paint, priming and sanding. It is then sprayed with our special “plate” gold, and 2-3 coats of gloss lacquer is applied over the gold to give it a beautiful luster, and visual depth.
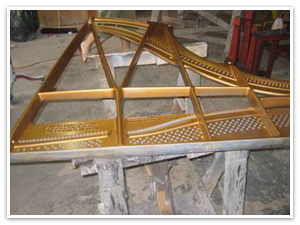
And we love to “letter” the plate!

Now that the plate, soundboard and bridges are ready, let’s work on the pinblock.
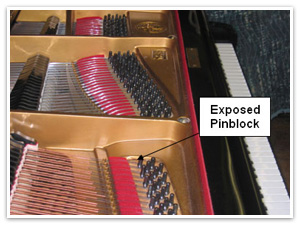
The pinblock is the laminated piece of rock maple that holds the pins tight. It is located under the plate, in the front of the piano. Some pianos have an “exposed” pinblock, which means the plate does not cover the block at the tuning pins. Below is an example of an exposed pinblock:
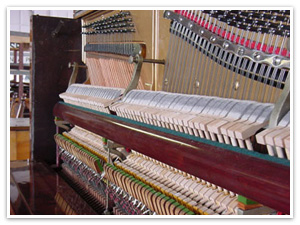
On most pianos, the plate covers the pinblock, as shown below on an upright
piano:
And with the plate removed:
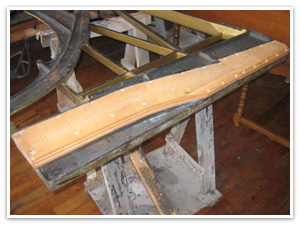
Here is a pinblock with the plate upside down.
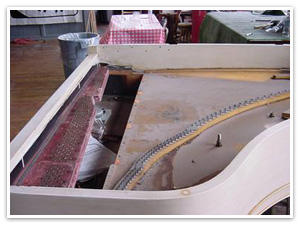
And with the plate removed.
Replacing the pinblock is essential for most restorations. It is rare that a 70 to 100 year old block has any life left in it. The block expands and contracts with humidity levels, like everything else made of wood. Eventually, the laminates begin to separate, the tuning pins get loose, and the piano no longer holds a tune.
Using a plank of Pinblock material, a duplicate is cut, fitted to the plate and the case, drilled and installed. This entire process is not only tedious; it must be done with the utmost care in every step.
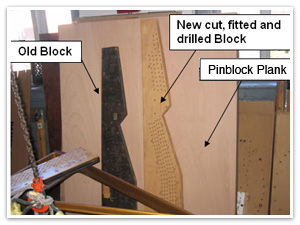
As mentioned before, the positioning of these components is one of the most critical aspects of rebuilding. It takes precise craftsmanship and time to do this correctly.
Once the plate and the block are in position, and installed, the “understring” felts are put on to dress the plate. All these felts, and string braiding are installed not only for cosmetics, but also to mute unwanted vibrations and overtones.
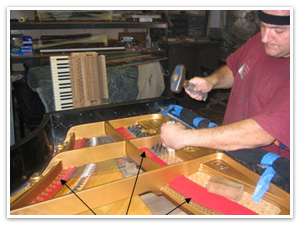
After the plate is dressed, we string the piano. The string end is inserted into the tuning pin, and coiled. The coiled tuning pin is hammered into the pinblock - the tuning pins are slightly larger than the holes that we drill in the pinblock, insuring a tight fit.
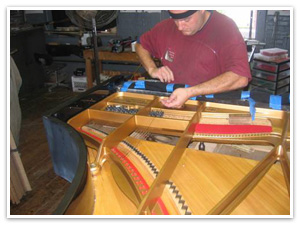
Great care is taken to make the coils and pins uniform, not only for form but function as well.
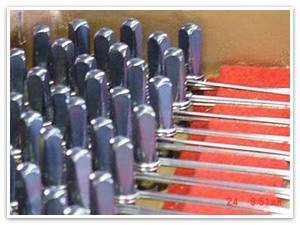
After all the strings are installed, the piano is “chipped”. This is a rough tuning to A=440, bringing the strings close to their proper tension. After chipping, the dampers are installed. The dampers are the felts that mute the vibration of the string when you lift your finger off the key. This is really part of the action, but we have always included replacing the dampers in the rebuilding process with the principle in mind- new strings, new damper felts.
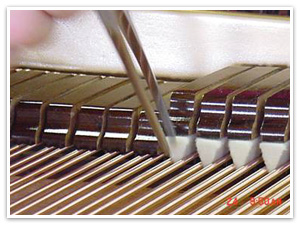
Once the dampers are installed and regulated, we are ready to install the action, and give the piano its final tunings.
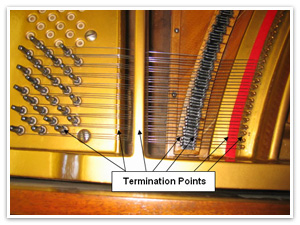
After rebuilding, the piano will go out of tune very quickly. Why? The tension of the strings need to “equalize” between termination points. A termination point is any point that the string rests on the plate or the bridge. There can be up to 8 termination points on a string. Remember the bridges? We wanted to keep the bridges free of finish so that the string will slide smoothly across the bridge- every time you play a newly rebuilt piano, the strings slide just a little bit, and eventually settle to hold a tune.
Upright Pianos—Rebuild or Restring?
Most shops do not rebuild upright pianos—they restring them. What is the difference?
The Pinblock
Behind this metal plate is a pinblock. The Blue Tuning pins are hammered
and set into it.
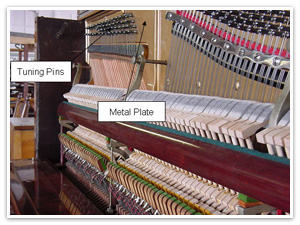
Most shops will leave the old pinblock as is, and simply hammer larger tuning pins into the old wood.
We, on the other hand, REPLACE the pinblock.
The piano is placed on its back, and all the strings, along with the plate is removed.
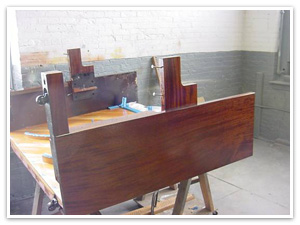
The Pinblock is then accessible.
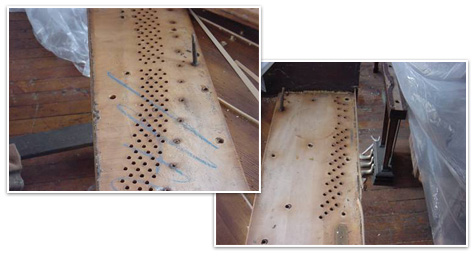
Since the Pinblock is such an integral part of the structure of an upright piano, it is best not to disrupt it. (Remember the incredible tension that these pianos hold)
The sections of the block that accommodates the tuning pins is routed out, to make room for the new pinblock material.
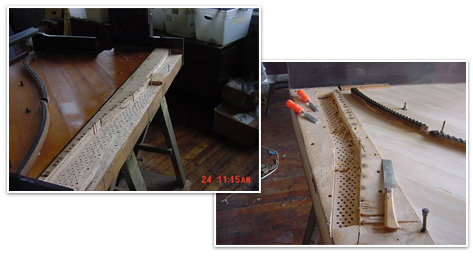
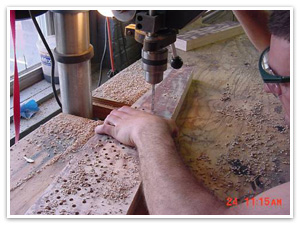
Once the old pinblock is removed, a piece of new pinblock material is cut and shaped to fit into the channel. The original holes for the pins are mapped and precisely drilled.
The holes are protected, and the insert is glued, dowelled and clamped into place.
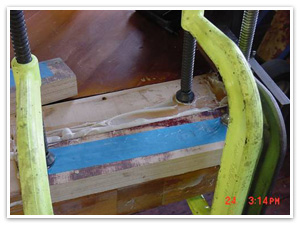
When the glue dries, the clamps are removed, and the pinblock is cleared of any excess glue. We are now ready to refinish the soundboard, install the plate, and string.
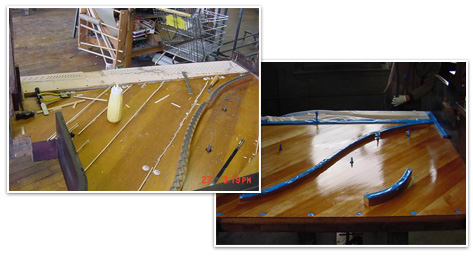
Once restrung, the action is installed and regulated, the dampers replaced, and here you have it: A rebuilt upright, with a new pinblock.
